Thursday, March 24, 2011

No I am not imaginary nor dead...

Well it has literally months since I made a post on the blog. There has been a number of reasons: work has been pretty crazy, general laziness and got sort of burnt out on the game over the holidays. Not to mention a series of crushing defeats that turned me off playing for a little while.

Anyhoo Segrig went away on vacation to Europe late last year, where he proposed and is now engaged, and I went on a painting binge in order to surprise him when he came back. Well the surprise was that I bought and painted the bulk of a new Hordes Legion of Everblight army. To make a long story short I painted about 25 points worth of Warlock, Beasts and Units in a couple of months...meaning I spent every spare moment painting.

I was pretty happy with the results but generally they are only table top quality and were pretty quick...I will posts pics in a post tomorrow or Saturday.

The purpose of this post is to layout my latest painting project...I acquired a unit of Striders and only really got them partially base coated. Lately I have been more interested in getting back into painting so I was looking at the models and trying to figure out what the final color scheme would be including shading, highlights and accent colors.

I decided I wanted to make the cloak a Forest Green but make the shading and highlights in the Brown and Beige family. Reason being is that they have stealth and they are blighted elves. In alot of the fantasy that I have read there are descriptions of Elven crafted cloaks that provide stealth like abilities and shimmer different colors. Since the Striders are depicted and described as being in the woods I thought that it would be a great challenge to create a "camouflage" forest cloak and if it works out a nice story to tell.

So I decided to fully basecoat one of the models and give it a try...here are of some pics.

Tomorrow and probably Saturday I will put some effort into the initial shading and highlighting...once I am done I will post some after pics...even if it turns out crap may as well document it :)

Will try and post more often...happy gaming.


Wednesday, March 9, 2011

tricks of the trade

i've been prepping a new batch of tin soldiers for the last couple of days. it dawned on me that i have definitely learned a thing or two that makes me better at painting/modelling than i used to be. tricks of the trade if you will. in that moment i realized that i should share some of my knowledge with others. so, enjoy!

before i begin i think i should mention that i came across these tidbits in many ways. some i taught myself, some were taught to me, and others i just saw and repeated.

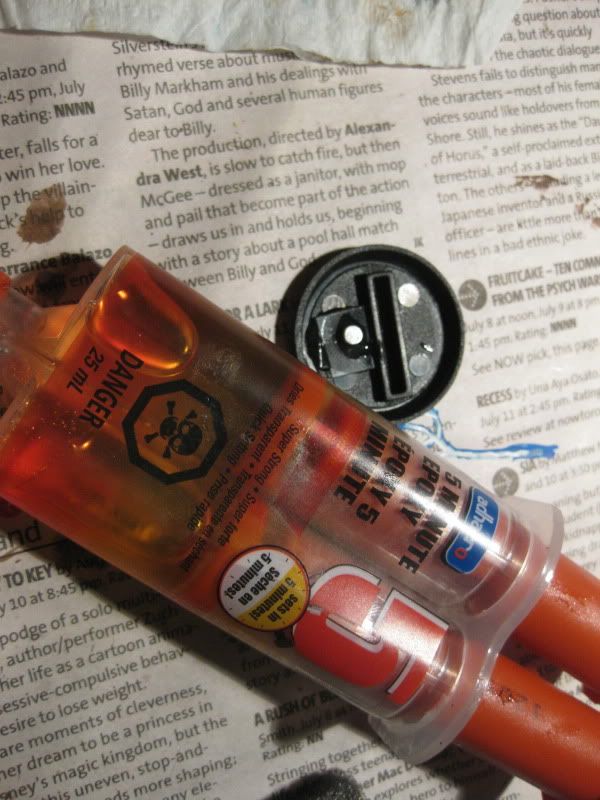
sticking things together - three words: five minute epoxy. Xevious told me about this stuff. it's a little harder to work with but holds so much better than superglue. its great for larger metal models.  things that get bumped and normally would break off and have to be reglued just dont ever break. its a two part glue that needs to be mixed together and i have learned to mix it in small batches. if you try to glue too many different things the glue will start to harden and become no good to work with. also, this stuff does take 5 minutes to hold something in place, so its usually best just to glue one thing at a time to make sure it doesnt go anywhere while it sets. i got mine at the dollar store and it works great.Photobucket

there are other times when i want a really good hold on something but its just too tricky to use the 5 minute epoxy. these are usually things like small based models arms or weapons, things that will stick out and probably get bumped and broken. for these i use a small amount of green stuff and superglue. i put a little bit of glue on both surfaces getting stuck together and put a tiny ball of greenstuff in the middle. this works really well, but if you use too much greenstuff it will squish out the middle.

rubbing off paint- you know when youre painting a model and you end off rubbing paint off with your fingers? or you are trying to paint something at a funny angle and rub paint off with your table? i dont do that anymore. i started using the  sponge pad that comes with a model in a blister pack. i mostly use it to lie my model on while im painting it and that way i can hold it by the base at whatever angle i want and never rub anything off. to me this seems so rudimentary. i feel as though that must be the obvious purpose to putting the sponge in the pack at all and everyone must do this already. so maybe i dont need to point it out, but no one pointed it out to me... so there you go.Photobucket

magnets - 
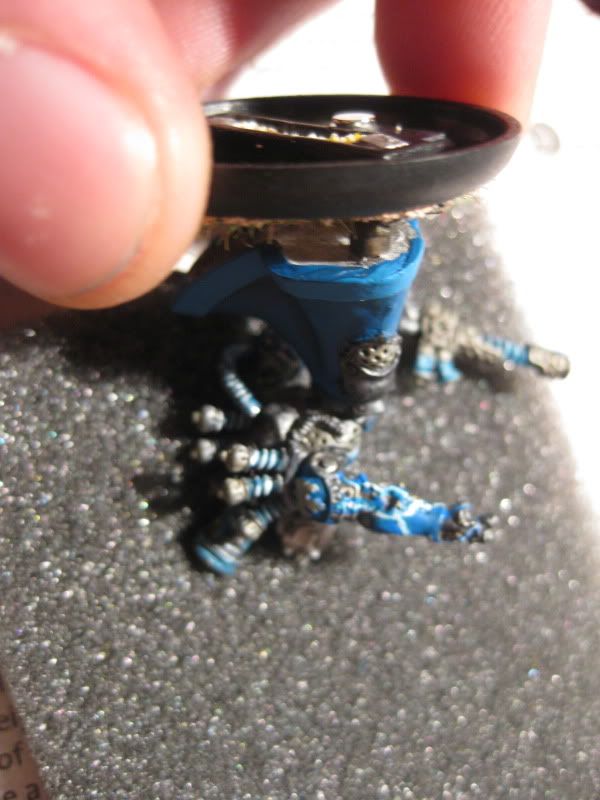
man these things are useful! i think that it is very widely known that magnets are a great way to give you options for your models. mr. model has two options for guns? why not slap magnets on his hands and both guns and have the option to swap them out on a whim?
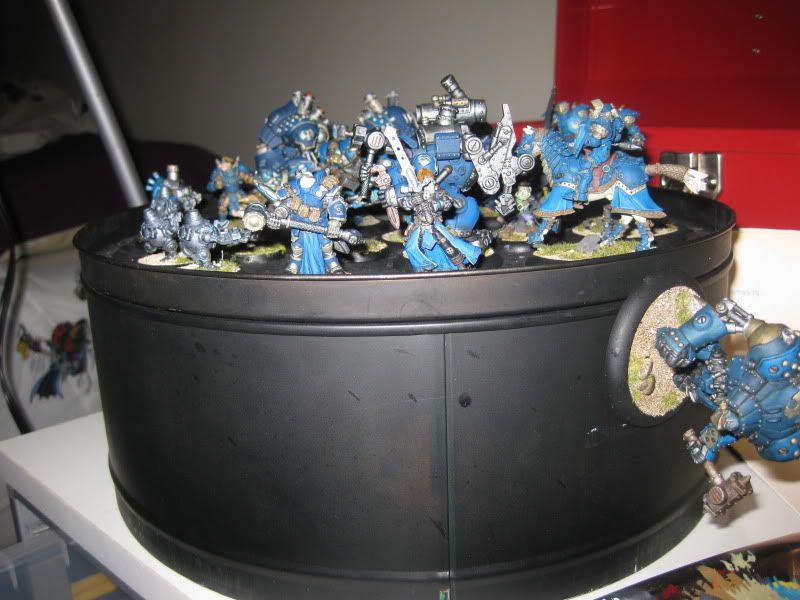
Xevious and i have been using them for another purpose: transportation. stick a magnet under the base of your models, put them in a cookie tin, and you have a great way to haul them around without worrying about breaking or scraping the paint off them. Photobucket Photobucket
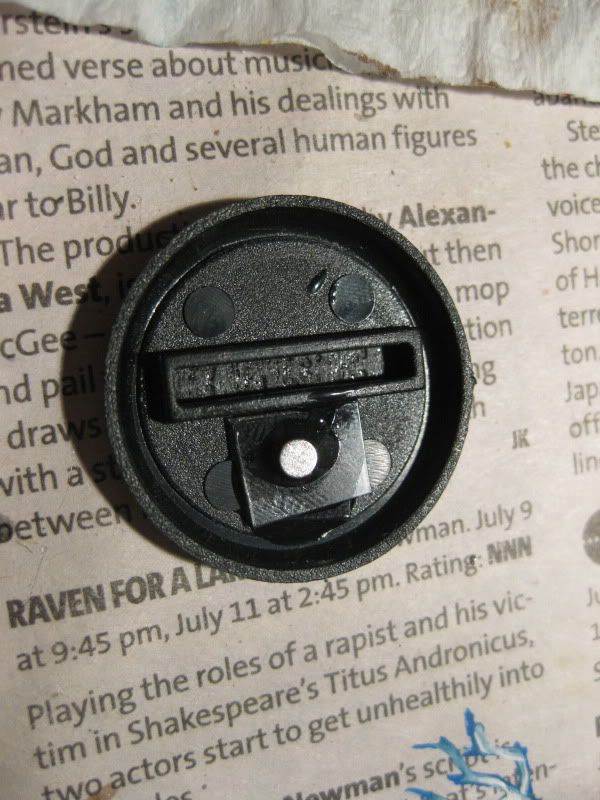
my technique goes like this: cut the blister pack up into little squares. mix up your 5 minute epoxy. layer the glue and plastic to a height that the magnet will be flush with the rim of the base when you stick it on. stick the magnet on with epoxy as well. perfecto.

i personally have started doing this before i even stick my models to their bases. this way you dont have to come up with some weird balancing act to make sure the magnet doesnt move before the glue sets. Xevious has told me he doesnt like to do it this way because the magnets mess up will mess up the sand he puts on his bases. i guess there must be iron in his sand, but i dont have any problems.

i guess that will be all for now. i know no one likes reading blog a entry with no pictures, so i'll snap a couple pics and let this update rip.

enjoy.

Saturday, March 5, 2011

i havent posted in quite some time. i just havent been able to motivate myself to post anything. i've managed to get some stuff painted, and tried to set up a decent spot to take photos. the lighting turned out to be a lot more of a hassle than i had anticipated and i got discouraged.

i made an order for a bunch of new models in january and they still havent arrived. i  just got an email that they were shipped yesterday. it frustrated me even moreso because i was contemplating playing in two tournaments that have come and gone in the last two weeks, but needed the new stuff to have a semi-viable list. i dont really want to whine about it, but i though i ordered this stuff with plenty of time to paint it before these tournaments.

anyways, ill have it soon.

later.

Wednesday, December 15, 2010

follow up

so,

i played a couple games today at a  friends place. two 15 point matchups against khador, the second of which was conceded pretty quickly when Siege and Co. set up shop and started blasting everything away. here is a picture of the end of the first game when the defender landed his hammer into sorcha to do that final point of damage. it ended up being a little too close for comfort, but it worked out.

i also managed to get a little bit of work done on my 'jack workshop. mostly just some shaping and patterning. i hollowed out the top of it too. i think its going to look pretty cool. i may put a little bit of paint on the chimney next or start working on the rest of the building. time will tell.

Friday, December 10, 2010

tangerine workshop

in between my pre-party chores today i managed to get a start on my structure. its just a "maroc" tangerine box. i pulled all the staples out of it, shortened the corner pieces, and shortened the length of it a little. Other than those little adjustments it was almost like a pre-made terrain piece. i made a roof out of cardboard which was also really easy to do. just at the end i glued two scrap pieces of styrofoam together that i will make a chimney out of.

i have a scheme of what i want the finished product to look like in my head. i made a couple simple sketches at work the other night aswell. im going for the 'jack repair shop on the outskirts of town motif. im going to try to make this one pretty cool.

heres a couple of pics i snapped with my iphone:

Thursday, December 9, 2010

Thoughts from my brain

I haven't done any painting since my last update. The wifey and I are having a party this weekend an I've been tidying up the laboratory (spare bedroom) for guests to stay in.

I was just about to throw a tangerine box in the fireplace when I thought I could very easily convert it into a large structure for terrain. I opened up my list of warmachine things to do and slipped in into place.

As I browsed down the list there was a couple of ideas I have saved for a rainy day. One was to start taking pictures of my completed models for easy updates. The other was a railroad terrain project, which sounds like a really fun idea. I would want to make a small station, a track along the board, and let the train move a couple of inches each turn. Or not at all.

Monday, December 6, 2010

if you click them, they will grow.

good news: nearly finished the knights
bad news: wifey took the camera (ie: no pictures of the steps.)
bad knews: one of my horses broke a leg
good news: i ficksed it.
bad news: his arm broke
good news: fixed that too.
bad news: there is still much to do
good news: i'll get around to it.

heres some pictures.
Photobucket
Photobucket
Photobucket
Photobucket

the sword knights still need some highlights and their spare swords, and the storm lance will need plenty of touching up. the leg that was broken needs to get de-uglied, and i managed to rub some paint off in spots during the repair process.

i used the sword knights the other knight in their current state, and was relatively happy with them. i have vowed to myself (and them) that i will learn the right spot for them in my force and make them a force to be reckoned with.

i tried to fish the horse with 5-min epoxy alone but that didnt work. i tried to fix him by drilling a bit and filling it with super glue and green stuff but that didnt work. finally i drilled deeper (in the TINY horses leg) and filled it with a rod and epoxy, which worked. in the end fixing him ended up being a pain in the ass and i lost the ambition to make a joke about horses with broken legs and glue factories. oh well, im sure you can figure something out.

until next time,

viva las vegas! errr.... HAPPY GAMING!